Have you ever wanted to touch something in Virtual Reality and hear a physical hardware synthesizer respond in the real world?
In this tutorial, I'll walk through how I built a bridge connecting the Meta Quest 3 VR headset to my Eurorack modular synth setup (specifically the Behringer Brains VCO). By pointing and selecting a floating, glowing 3D gem in virtual space, an arpeggiated MIDI sequence is instantly generated in a custom .NET backend, routed through Akai MPC 3 software in controller mode, sent out via Control Voltage (CV) from an MPC Live II, and played live on Eurorack hardware!
Here is the complete step-by-step breakdown of the architecture, code, DAW configuration, and physical patching so you can build your own VR-to-hardware MIDI/CV bridge.
🛠 Hardware & Software Stack
Hardware
- Meta Quest 3 (Standalone VR Headset using the built-in browser)
- Apple Mac (Hosting the local .NET server and DAW)
- Akai MPC Live II (Operating in Controller Mode)
- Behringer Brains VCO (Eurorack Multi-Engine Oscillator Module)
- 3.5mm TS patch cables (For CV / Gate signals)
Software
- ASP.NET Core (C#) minimalist web server
- Melanchall DryWetMidi (C# library for creating Virtual MIDI ports on macOS)
- A-Frame 1.6.0 (WebXR / 3D Framework running HTML5 & WebGL)
- Akai MPC 3 Software (Acting as the DAW and MIDI-to-CV converter)
📐 Signal Flow Architecture
[ Meta Quest 3 Browser ]
        │ (HTTPS POST /sequence over local Wi-Fi)
        ▼
[ ASP.NET Core Backend (Mac) ]
        │ (DryWetMIDI C# Virtual Device)
        ▼
[ Virtual MIDI Port: "Quest Virtual Controller" ]
        │ (MIDI In)
        ▼
[ Akai MPC 3 Software (Controller Mode) ]
        │ (CV Track Routing)
        ▼
[ MPC Live II Hardware ] ──(Physical 3.5mm Cables)──► [ Eurorack: Behringer Brains ]
  • CV Out 1 (Pitch 1V/Oct)                           • 1V/Oct Pitch Input
  • CV Out 2 (Gate/Trigger)                           • Trig / Gate Input
Step 1: The .NET Backend & Virtual MIDI Device
To let the browser talk to our DAW, we need a lightweight HTTP server on our Mac that exposes endpoints and creates a Virtual MIDI Input Device. We use Melanchall.DryWetMidi to create a virtual port called "Quest Virtual Controller".
Program.cs
using Melanchall.DryWetMidi.Multimedia;
using Melanchall.DryWetMidi.Core;
using Melanchall.DryWetMidi.Common;

var builder = WebApplication.CreateBuilder(args);

// Configure Kestrel to listen on all interfaces (0.0.0.0) with SSL/HTTPS
// Meta Quest browser requires HTTPS for local network access & WebXR features
builder.WebHost.ConfigureKestrel(serverOptions =>
{
    serverOptions.Listen(System.Net.IPAddress.Any, 5224, listenOptions =>
    {
        listenOptions.UseHttps("dev-cert.pfx", "YourCertPassword");
    });
});

var app = builder.Build();

// Create a virtual MIDI device visible to macOS DAWs
using var virtualDevice = VirtualDevice.Create("Quest Virtual Controller");

// Serve the A-Frame WebVR interface
app.MapGet("/", () => Results.Content(File.ReadAllText("index.html"), "text/html"));

// POST Endpoint: Plays an Arpeggiated Sequence (C - E - G - C)
app.MapPost("/sequence", async () => {
    int[] notes = { 60, 64, 67, 72 }; // Note numbers
    foreach (var note in notes)
    {
        // Note On (Velocity 100)
        virtualDevice.OutputDevice.SendEvent(new NoteOnEvent((SevenBitNumber)note, (SevenBitNumber)100));
        await Task.Delay(150); // 150ms step timing
        // Note Off
        virtualDevice.OutputDevice.SendEvent(new NoteOffEvent((SevenBitNumber)note, (SevenBitNumber)0));
    }
    return Results.Ok();
});

app.Run();
Tip on HTTPS: The Meta Quest browser requires HTTPS when making local network requests or invoking WebXR session features. Using
dev-cert.pfxor a tool likemkcertallows HTTPS connections over your local IP (e.g.,https://192.168.1.X:5224).
Step 2: Building the VR Interface with A-Frame
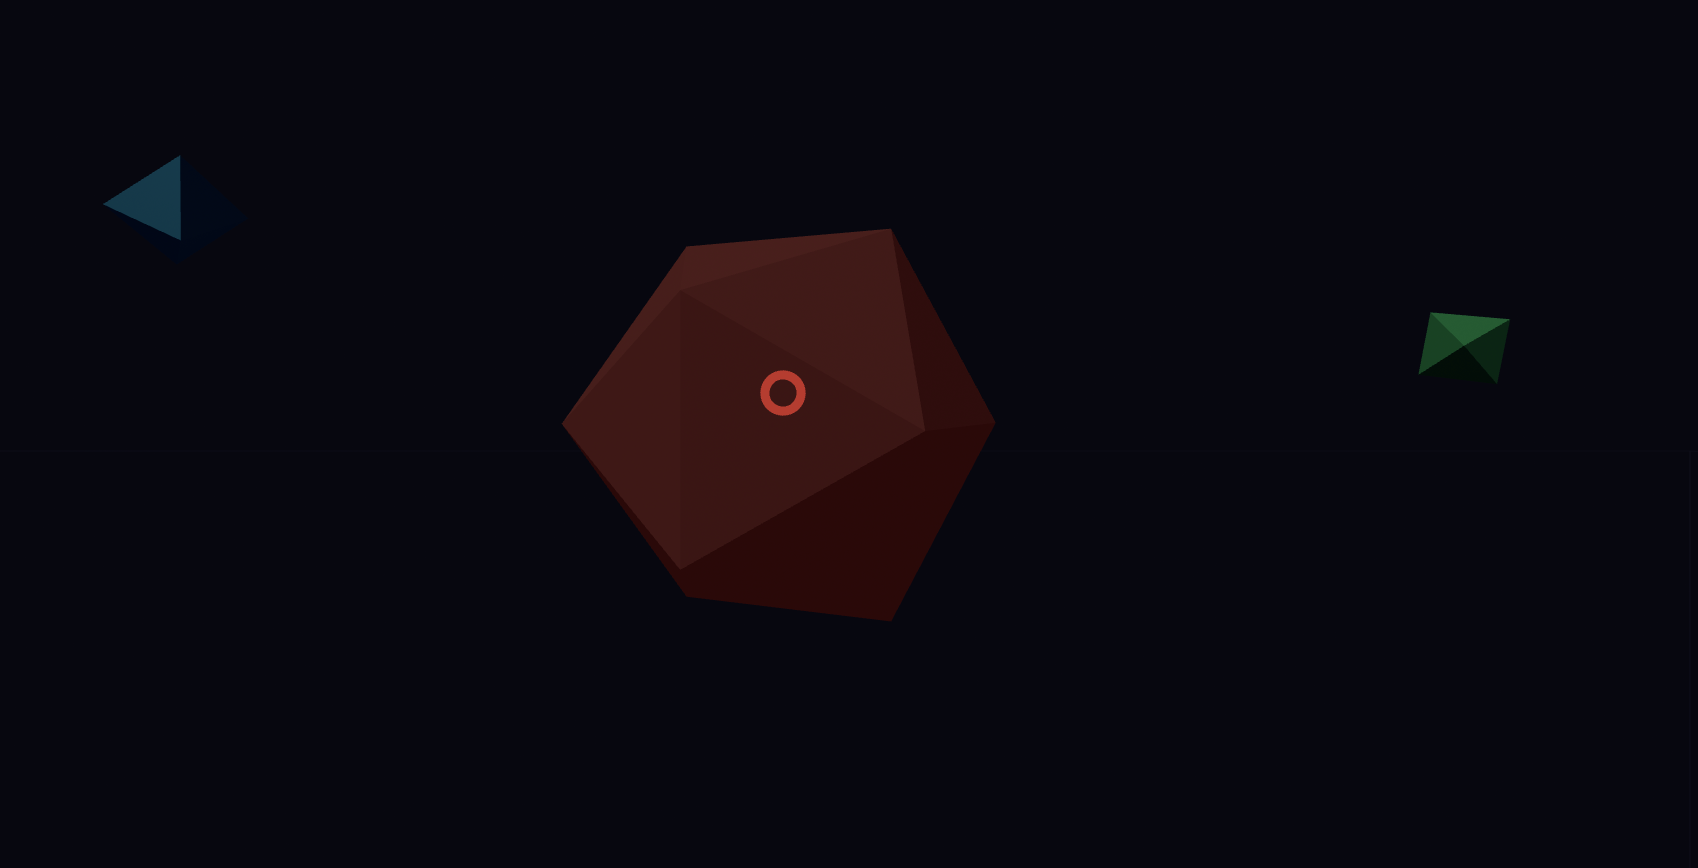
We render a glowing red 3D gem (icosahedron) inside an immersive A-Frame VR scene. When touched or selected with the Meta Quest VR controller laser (or gaze cursor), it fires an HTTP POST request to /sequence and triggers a visual pulse animation.
index.html
<!DOCTYPE html>
<html lang="en">
<head>
    <meta charset="UTF-8">
    <meta name="viewport" content="width=device-width, initial-scale=1.0">
    <title>Quest MIDI VR Controller</title>
    <script src="https://aframe.io/releases/1.6.0/aframe.min.js"></script>
</head>
<body style="margin: 0; overflow: hidden; background-color: #0a0a14;">

    <a-scene renderer="antialias: true; colorManagement: true;">
        <a-sky color="#070710"></a-sky>
        <a-plane rotation="-90 0 0" width="50" height="50" color="#1c1c3a" wireframe="true" material="opacity: 0.25; transparent: true"></a-plane>

        <a-light type="ambient" color="#22223b"></a-light>
        <a-light type="directional" color="#ffffff" intensity="0.5" position="-2 4 2"></a-light>

        <!-- Interactive Floating Gem -->
        <a-entity id="midiGem" class="clickable"
                  geometry="primitive: icosahedron; radius: 0.6"
                  position="0 1.5 -3"
                  material="color: #ff3b30; roughness: 0.1; metalness: 0.9; emissive: #400a0a; emissiveIntensity: 0.5"
                  animation="property: rotation; to: 0 360 0; loop: true; dur: 8000; easing: linear">
            <a-light id="gemLight" type="point" color="#ff3b30" intensity="0.8" distance="4"></a-light>
        </a-entity>

        <!-- Camera Rig & VR Controllers -->
        <a-entity camera look-controls position="0 1.6 0">
            <a-entity cursor="fuse: false" position="0 0 -1"
                      geometry="primitive: ring; radiusInner: 0.015; radiusOuter: 0.025"
                      material="color: #ff3b30; shader: flat; opacity: 0.7; transparent: true"
                      raycaster="objects: .clickable">
            </a-entity>
        </a-entity>

        <a-entity laser-controls="hand: left" raycaster="objects: .clickable; far: 20"></a-entity>
        <a-entity laser-controls="hand: right" raycaster="objects: .clickable; far: 20"></a-entity>
    </a-scene>

    <script>
        const gem = document.getElementById('midiGem');
        let isCooldown = false;

        const triggerMidiSequence = async () => {
            if (isCooldown) return;
            isCooldown = true;

            // Send trigger to .NET backend
            try {
                fetch('/sequence', { method: 'POST' });
            } catch (err) {
                console.error("Failed to trigger sequence:", err);
            }

            // Visual feedback pulse in VR
            gem.setAttribute('scale', '1.4 1.4 1.4');
            gem.setAttribute('material', 'color', '#ffffff');

            setTimeout(() => {
                gem.setAttribute('scale', '1 1 1');
                gem.setAttribute('material', 'color', '#ff3b30');
                isCooldown = false;
            }, 300);
        };

        gem.addEventListener('click', triggerMidiSequence);
    </script>
</body>
</html>
Step 3: DAW Configuration (MPC 3 Software & MPC Live II)
Now we route the incoming MIDI from our virtual port out to CV signals via the MPC Live II hardware.
- Connect MPC Live II: Connect the MPC Live II to your Mac via USB and put it into Controller Mode.
- Open MPC 3 Software: Ensure MPC 3 is linked to the connected MPC Live II hardware.
- MIDI Preferences:
- Navigate to
Preferences->MIDI / Sync. - Under MIDI Inputs, locate "Quest Virtual Controller" (created by our .NET app) and enable Track input.
- Create a CV Track:
- Add a new track in MPC 3 and set the Track Type to CV.
- Set MIDI Input for this track to
"Quest Virtual Controller". - Set CV Port to CV Out 1 (for Pitch/1V Oct).
- Set Gate Port to CV Out 2 (for Trigger/Gate).
Step 4: Patching to the Behringer Brains Eurorack Synth
With the MPC Live II outputting CV signals on physical jacks 1 & 2, patch them directly into your Eurorack case:
- Pitch CV Patch: Connect a 3.5mm TS mono patch cable from MPC Live II CV Out 1 into the 1V/OCT Pitch Input on the Behringer Brains module.
- Gate/Trigger Patch: Connect a second 3.5mm TS mono patch cable from MPC Live II CV Out 2 into the TRIG / GATE Input on the Behringer Brains module.
- Audio Monitoring: Patch the Audio Output of the Behringer Brains into your mixer or audio interface to monitor the synth sound.
Step 5: Putting It All Together!
- Start your .NET application:
dotnet run - Put on your Meta Quest 3 headset, launch the Meta Quest browser, and navigate to your Mac's IP address:
https://192.168.x.x:5224 - Accept the self-signed developer SSL certificate warning if prompted.
- Look at the glowing floating red gem and pull the trigger on your Quest controller!
⚡ Result: Selecting the gem triggers /sequence in C#, which emits MIDI notes on the virtual port. MPC 3 receives those notes, converts them into analog 1V/Oct CV and Gate pulses out of the MPC Live II, and plays the arpeggiated sequence live on the Behringer Brains Eurorack oscillator!
Future Ideas & Expansion
- Spatial Audio Feedback: Using WebAudio API / Soundstage VR to place spatialized sound emitters matching the synth patch.
- Continuous VR Control (Knobs & Faders): Using WebSockets or SignalR to send continuous MIDI CC events as you move your VR hands, letting you control the Timbre and Harmonics parameters on the Behringer Brains in real-time.