Lately, I’ve been looking for ways to blend my background as a software engineer with my creative projects. I recently built a custom robot puppet for Adobe Character Animator, and the process involved a unique “AI-assisted texturing” technique, a waveform-based mouth design, and a custom-coded speech engine.
Step 1: Base Design and the “Green Screen” Trick
I started the project in Adobe Fresco on my iPad, sketching out the robot’s main chassis. To save time on the intricate mechanical details, I used a shortcut:
- I drew the main frame but filled the “internal” sections with a solid green color.
- I took this into Google Gemini and instructed the AI to replace the green areas with “intricate, colorful wires.”
This allowed me to maintain total control over the robot’s silhouette while the AI handled the “greebling”—the time-consuming process of adding tiny mechanical details.


Step 2: Designing a Robotic Mouth with Waveforms
Since this is a robot, I didn’t want a standard humanoid mouth. I wanted something that looked like a digital display.
- The Seed: I created a single base image—a simple rectangle with a black background and a single green “heart monitor” wave design.
- The Generation: I uploaded this to Google Gemini and asked it to create a larger image containing 15 variations of that original design, each with a unique wave pattern.
- The Visemes: These 15 unique waveforms became my “mouth shapes” (visemes). Each wave represents a different phonetic sound, giving the robot a flickering, oscilloscope-style mouth whenever it speaks.


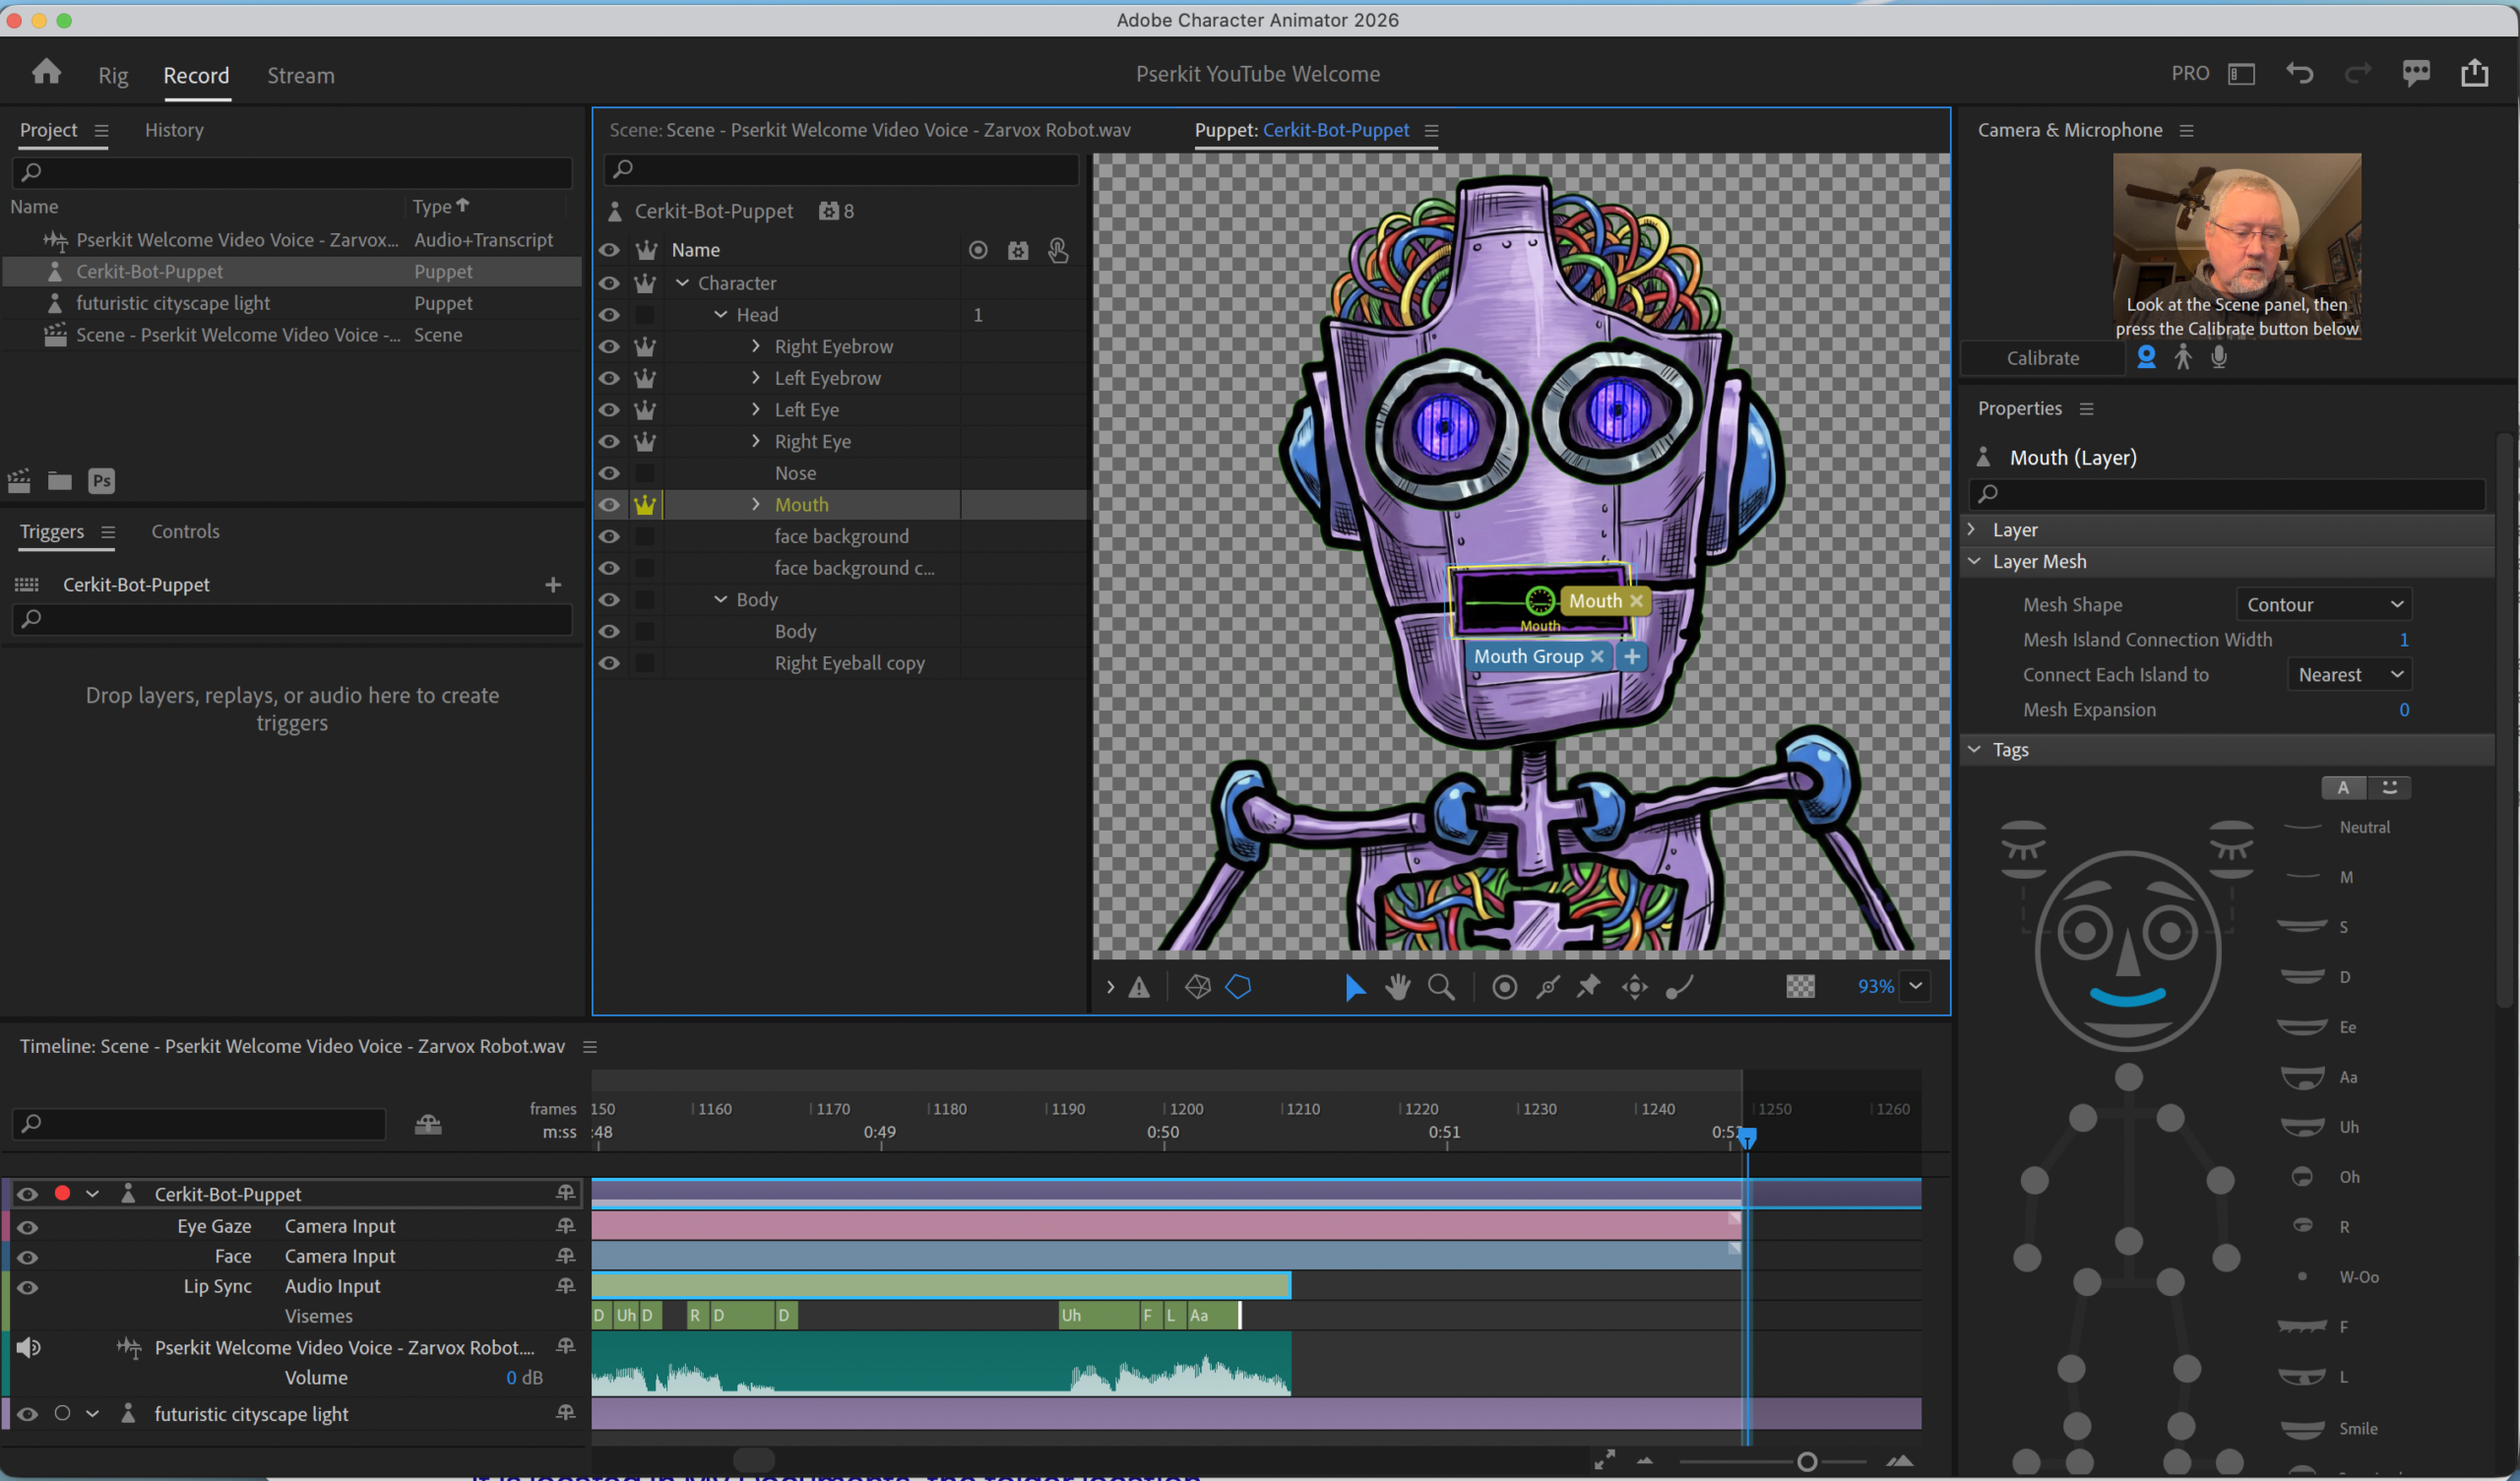
Step 3: Photoshop Assembly using the Adobe Template
To get the puppet ready for animation, I used the official Adobe Character Animator PSD template.
- The Structure: I placed my detailed robot frame into the
+Headand+Bodygroups. - The Waveform Mouth: I took my 15 unique Gemini-generated wave patterns and placed them into the
+Mouthgroup. - Mapping the Sounds: I assigned each waveform to a specific layer name required by Adobe (such as
Ah,Oh,W-OO, etc.). Because I used the template’s naming conventions, Character Animator knows exactly which waveform to display.

Step 4: Driving the Animation with Custom Code
Instead of using a live microphone to drive the puppet, I took a more “engineered” approach.
I wrote a custom program that uses a Text-to-Speech (TTS) engine to generate computer voices. I feed my script into this program, and it outputs a .wav file.

In Adobe Character Animator, I import this .wav file and use the “Compute Lip Sync from Scene Audio” feature. This precisely maps my 15 waveform images to the generated speech. Finally, I record the character’s head and eye movements in a second pass as I listen to the transcript being read by my custom software.
The Final Result
By combining manual iPad sketches, AI-generated textures, and my own custom code, I’ve created a workflow that is efficient and unique. The result is a robot whose “voice” is a perfect digital blend of code and art!